This page may contain affiliate links. As an Amazon Associate I earn from qualifying purchases. Please see my Privacy Policy for more details. Advertisements displayed do not reflect endorsements or recommendations made by Veggie Inspired.


Crispy, crunchy coating on the outside, tender cauliflower on the inside. Top it off with a tangy slaw and creamy dairy-free tartar sauce and throw it all in a warm tortilla for the most amazing Vegan Cauliflower Tacos you’ve ever had!

Save this Post!
Each bite of these Crispy Vegan Cauliflower Tacos is a harmonious blend of textures and flavors. The contrast between the crispy cauliflower, the crunchy slaw, and the creamy dairy-free tartar sauce creates an experience that is both satisfying and nutritious.
Reminiscent of a fried fish taco, it’ll have you dreaming of the waves breaking on the sand while you dine seaside. Perhaps a Pineapple Coconut Smoothie, which tastes like a virgin piña colada, or a blood orange margarita, would be a great choice to wash it down.
Whether you’re a vegan looking for a plant-based taco option or simply seeking a delicious and healthy meal, these tacos are sure to become a favorite. Prepare them for a casual dinner or impress your friends and family at your next gathering. These Crispy Vegan Roasted Cauliflower Tacos are a true culinary delight that will leave everyone asking for seconds.
Ingredients you need

Cauliflower ~ You can’t have cauliflower tacos without cauliflower! Choose a cauliflower that is firm and tightly closed with a pale white color all over.
I find a wide, short cauliflower is the easiest shape to cut into long, thin slices, but don’t fuss about the shape – any of them will do!
Coconut milk ~ Full fat canned coconut milk is creamy and thick and will coat the slices best allowing the breading to adhere easily. I’ve made these with canned light coconut milk, too, and that also works.
I would not suggest using a thinner milk, like soy milk, almond milk, or rice milk.
Lime ~ Fresh lime juice brightens up the flavors.
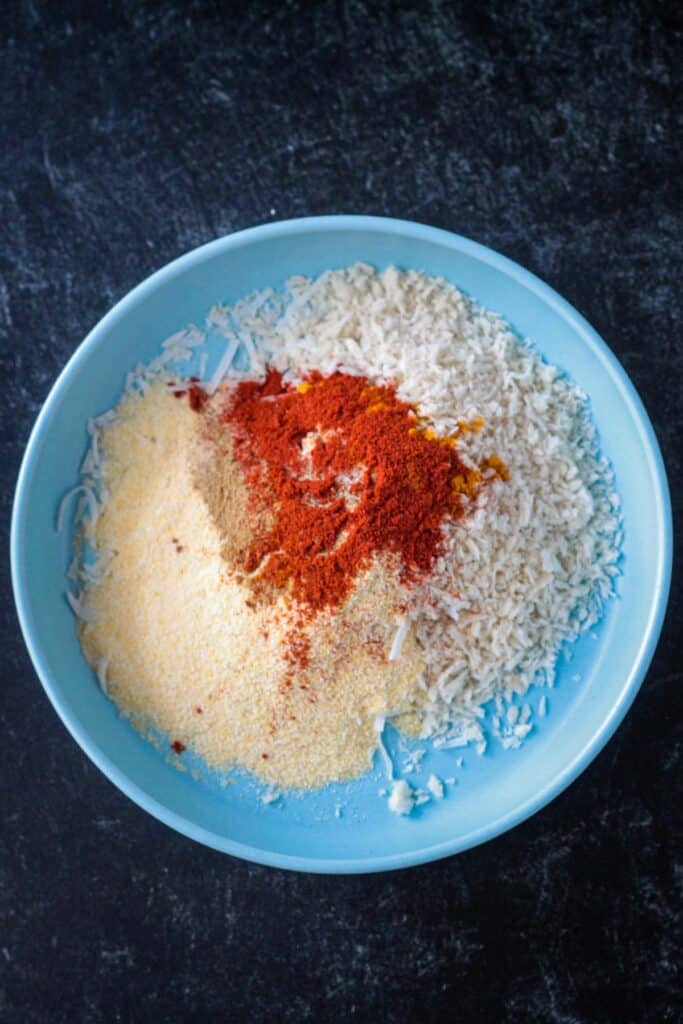
Breading ~ The breading is made from a combination of cornmeal, panko breadcrumbs, and unsweetened shredded coconut. This makes for a crispy, crunchy coating and no oil is needed!
The coconut (be sure to use unsweetened), along with the lime juice in the dredge, is what creates the vegan fish taco vibes…think coconut shrimp, but meatless!
Regular breadcrumbs will work in a pinch, but won’t be as crunchy as panko.
If you can’t or don’t want to use coconut, simply add more panko breadcrumbs to the mixture.
Spices ~ Breadcrumbs and cornmeal on their own are very bland, so we are of course spicing it up! Smoked paprika, cumin, garlic powder, turmeric, and salt and pepper bring lots of savory flavor.
How to make cauliflower tacos
Please scroll down to the recipe card for exact ingredient measurements and instructions.
Prepare the cauliflower.

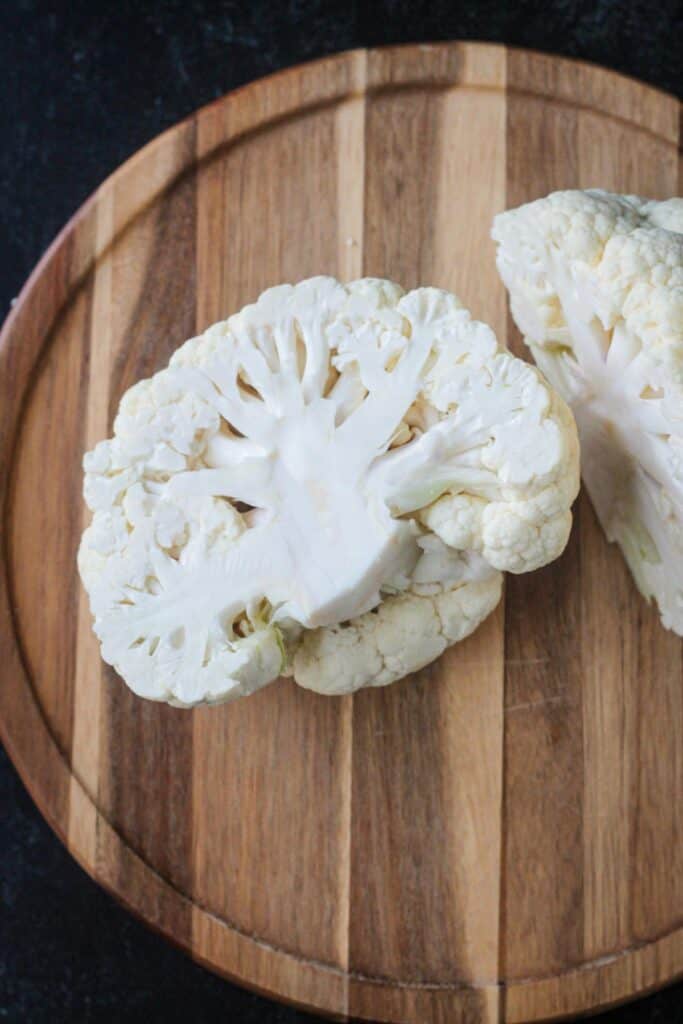
Stand the cauliflower up on a cutting board and slice it in half from top to bottom.
Trim off the excess stem, leaving just enough to keep the florets attached.
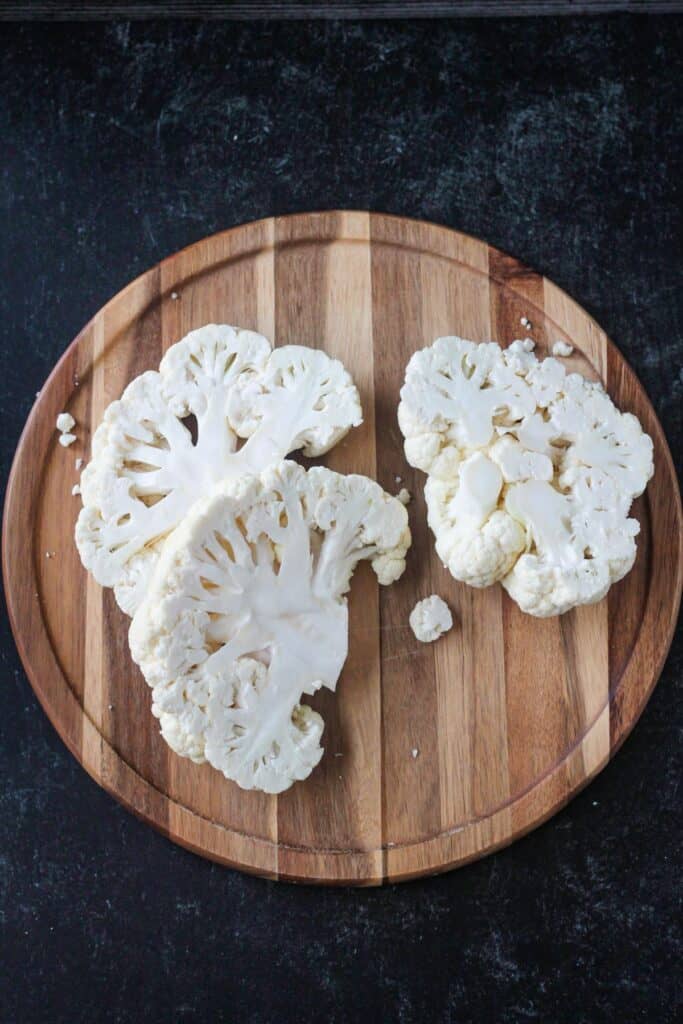
Slice each half into thinner slices. I usually get about 3 slices per half. The further away from the center you get, the harder it is going to be to keep the florets from breaking apart.
I usually cut each slice in half again from top to bottom to make them easier to work with and a bit less delicate.
Don’t worry if it falls apart. You can bread the florets the same way you will bread the slices and it will taste just as delicious!
Set up the breading station.


In a wide, shallow bowl combine the coconut milk, fresh lime juice, and lime zest and whisk well.
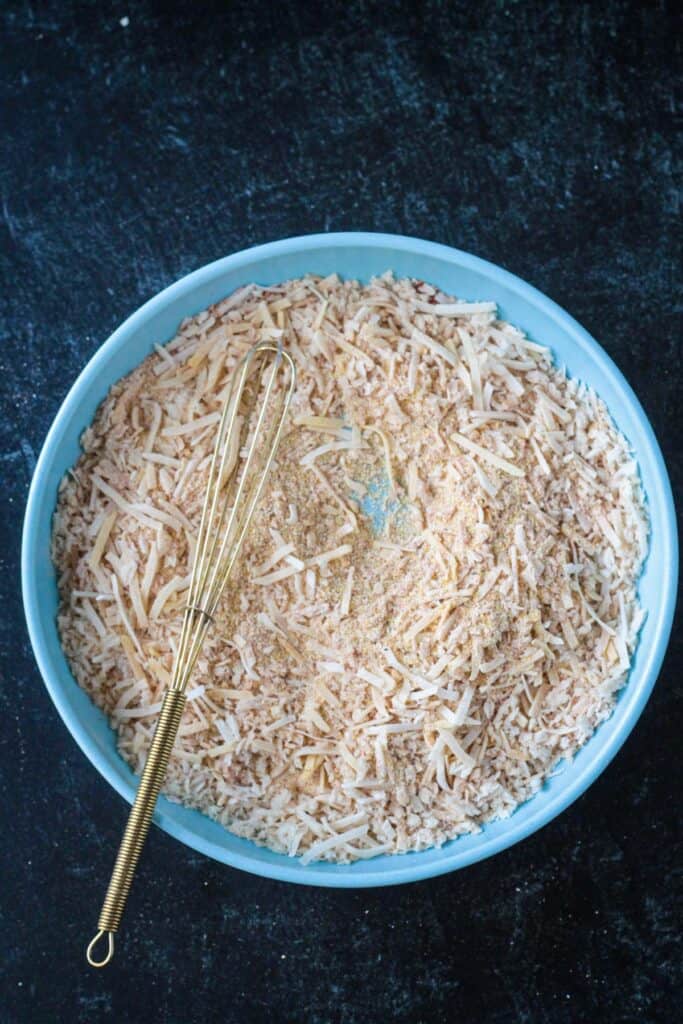
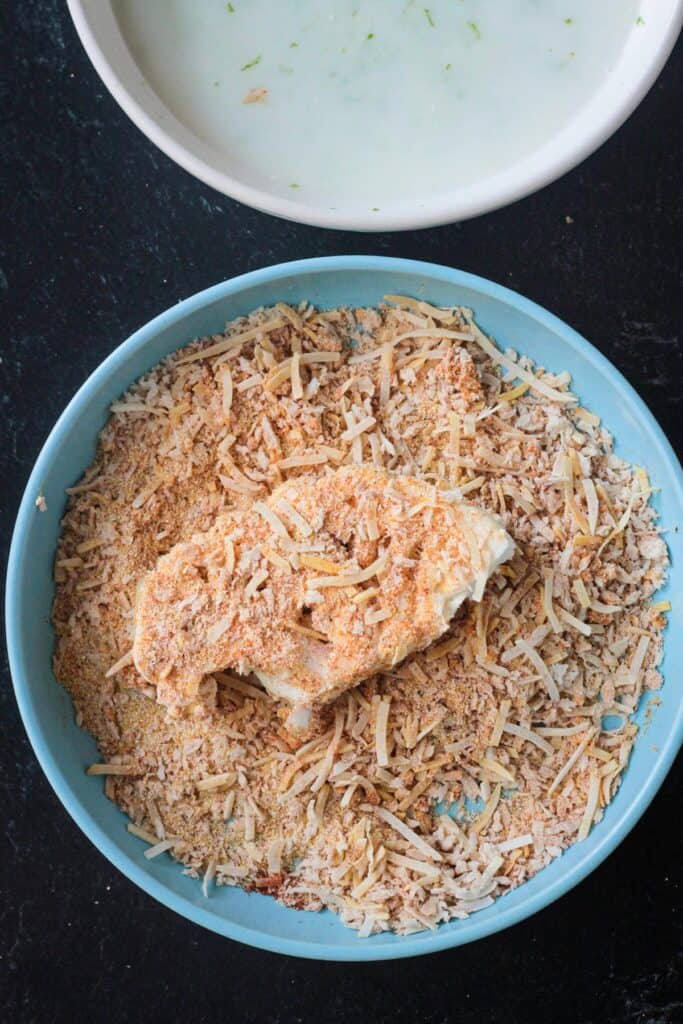
In a separate wide, shallow bowl, combine the breading ingredients and spices and whisk well to combine.
Bread the cauliflower slices.
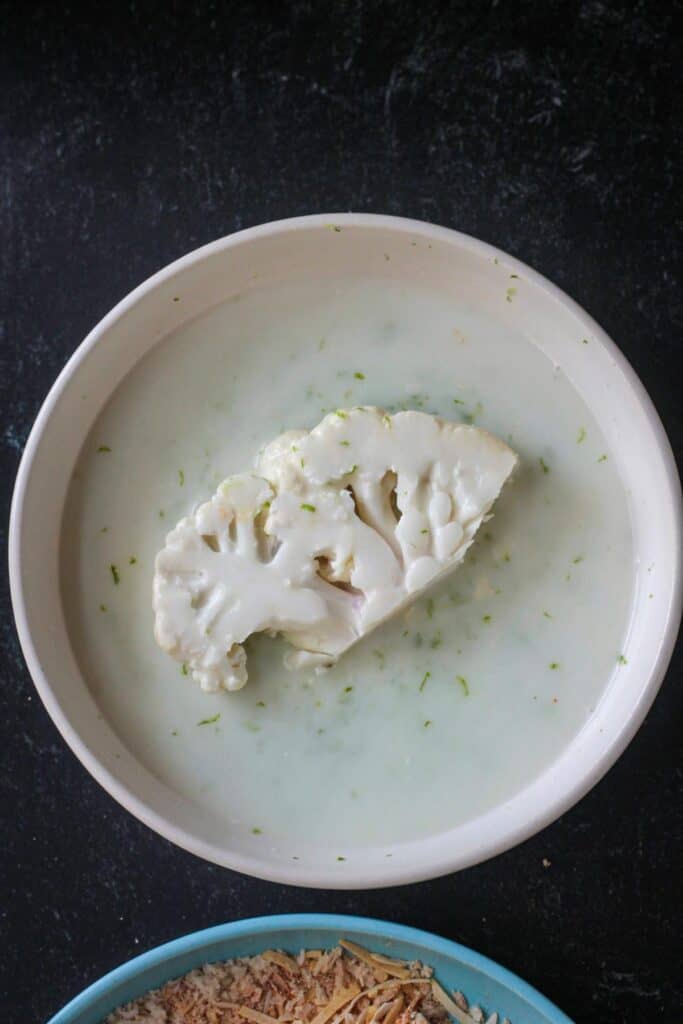
Place one slice of cauliflower into the coconut milk mixture until well coated on the bottom. Gently flip it over and coat the second side well.
Place the coconut milk coated slice into the breading mixture and press it down so the breading adheres. Gently flip the cauliflower over and press the second side into the breading, making sure to coat the top, bottom and sides.
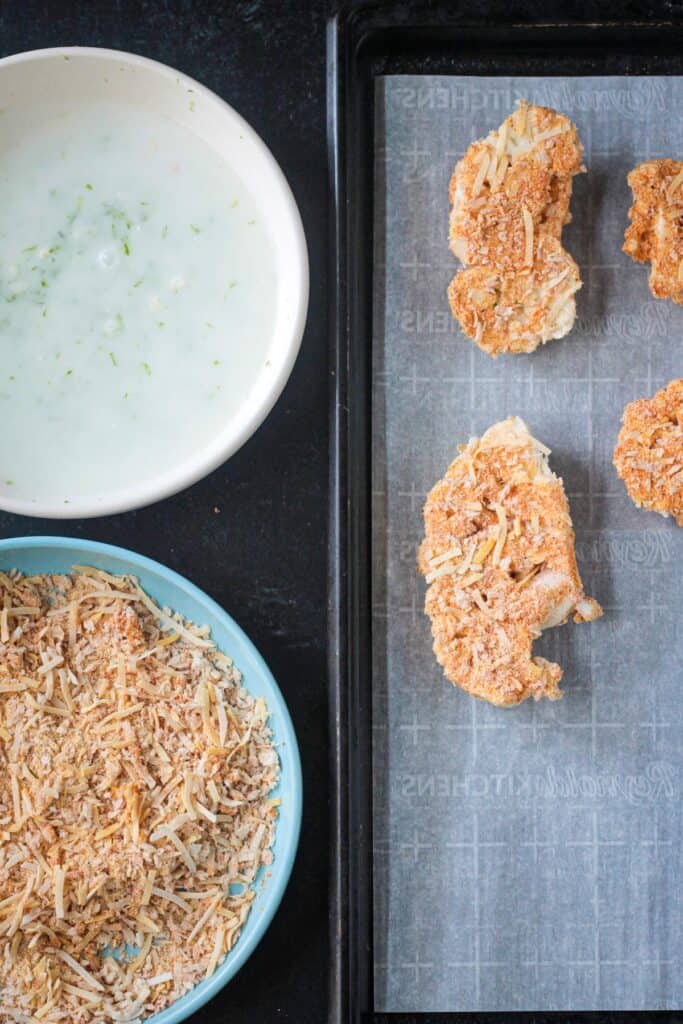
Transfer the breaded cauliflower to a parchment lined rimmed baking sheet.
Repeat with the remaining slices of cauliflower.
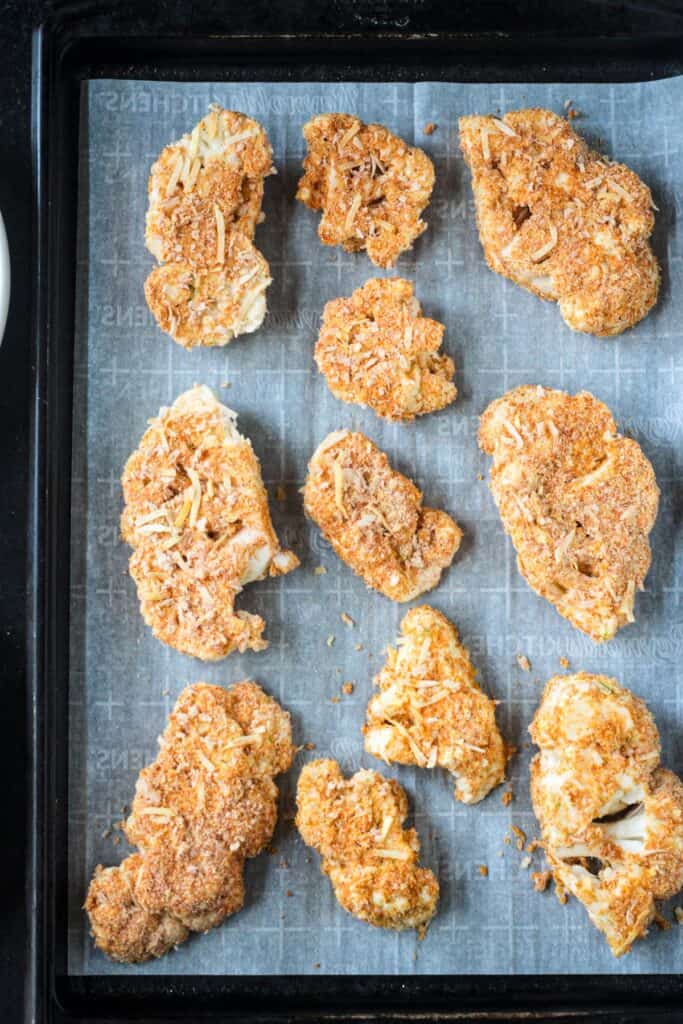
Bake until the coating is crunchy and the cauliflower is tender.
Assemble the tacos.


Place some coleslaw on a warm tortilla, top with a slice of crispy roasted cauliflower, and drizzle some vegan tartar sauce over the top.
Finish with some fresh chopped cilantro or a few dashes of hot sauce or chipotle crema, if desired.

Serving suggestions
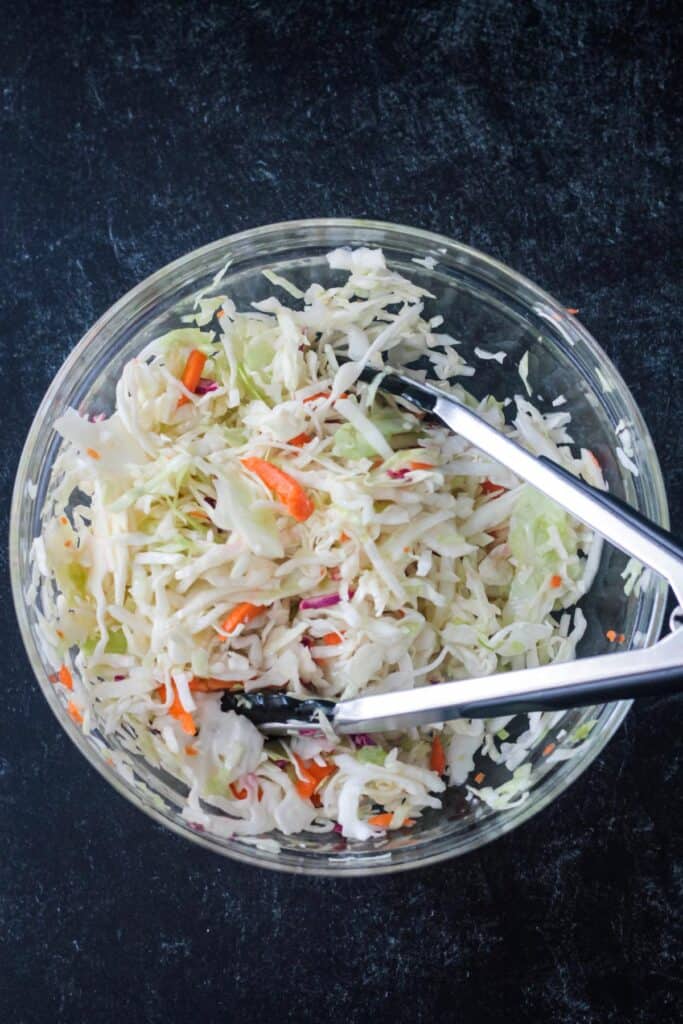
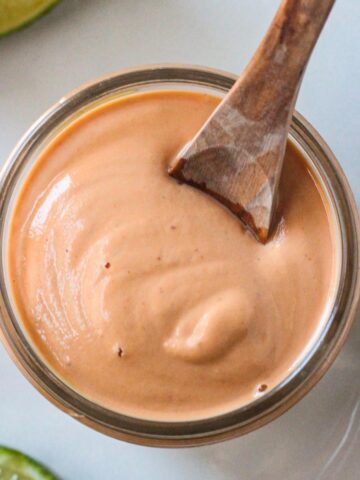
We love these cauliflower tacos with a tangy sweet and sour slaw and creamy dairy-free tartar sauce – both recipes included in the recipe card below.
Sometimes we skip the tortillas and dip the breaded roasted cauliflower right into the tartar sauce. Serve the coleslaw on the side.
These crispy cauliflower tacos are surprisingly filling, but if you’re looking to round out your meal, serve up a side of refried beans or corn salad.
Other tasty topping ideas: guacamole, quick pickled red onions, or fresh peach salsa.
Love tacos? Don’t miss these other vegan taco favorites:
Storage
Fridge: Store the breaded cauliflower, coleslaw, and tartar sauce all separately in air-tight containers in the fridge for up to 5 days.
Reheat: To reheat the cauliflower, I suggest warming in a 400°F oven for 5 to 10 minutes to keep the breading crunchy.

Pro tips and tricks
~ Trim away as much of the thick, fibrous cauliflower stem as possible while allowing the florets to stay attached.
~ Don’t worry, however, if the florets fall apart. It will taste just as delicious no matter how the cauliflower is cut.
~ Do not sub another milk for the canned coconut milk. You need creamy, thick texture to coat the florets and allow the breading to stick.
~ For the ultimate crunchy coating, use cornmeal and panko breadcrumbs. Regular breadcrumbs will work in a pinch, but won’t be as crispy.
~ For best results, make sure each slice of cauliflower is fully coated on all sides with the milk mixture and then with the breading.
~ Do not overcrowd the pan. Make sure to leave space between each cauliflower slice. If they are touching, they may steam instead of roast leaving the breading soggy instead of crisp.
~ Warm the tortillas by placing them one at a time in a dry skillet over medium-low heat until they just start to brown, about 1 to 1 ½ minutes per side.
~ For a gluten-free option, use gluten-free panko breadcrumbs and corn tortillas.
~ For the coleslaw, bagged coleslaw works just as well and would be a nice time saver. Honestly, I do this more often than not!
~ For meal prep, the coleslaw and tartar sauce can both be made in advance.
FAQs
Make sure to use canned coconut milk. The thick, creamy texture will easily coat the cauliflower and allow the breading to stick. Also, make sure to use shredded coconut, not coconut flakes as those will be too large and may prevent the breading from sticking. If you can only find flakes or large shreds, pulse them in a food processor for a few seconds to break them down before adding them to the breading.
The biggest culprit for mushy cauliflower is overcrowding the pan. Make sure there is space between each slice so the breading can get crispy.
Yes! Check out the cooking instructions in this Crunchy Air Fryer Cauliflower recipe. The breaded cauliflower for these tacos can be cooked in the same manner.

I hope you love this recipe as much as we do! If you tried it, please use the star rating system in the recipe card and leave a comment with your feedback. ⭐️⭐️⭐️⭐️⭐️
For even more easy family recipes, be sure to check out my cookbook, The Meatless Monday Family Cookbook!

Crispy Vegan Cauliflower Tacos
Recommended Equipment
Ingredients
Breaded Cauliflower
- 1 cauliflower
- ½ cup full fat coconut milk
- Juice and Zest of 1 lime
- 1 teaspoon salt divided
- ½ cup panko breadcrumbs gluten free if necessary
- ½ cup cornmeal
- ½ cup unsweetened shredded coconut
- 1 ½ teaspoons smoked paprika
- 1 teaspoon cumin
- ½ teaspoon garlic powder
- ¼ teaspoon turmeric
- ¼ teaspoon pepper
Sweet and Sour Slaw
- 1 ½ cups chopped cabbage red or green cabbage or a combination of both
- ½ cup shredded carrots
- Juice of 1 lime
- 1 tablespoon white vinegar
- 1-2 teaspoon(s) pure maple syrup
- ½ teaspoon salt
Tangy Vegan Tartar Sauce
- ½ cup homemade vegan mayonnaise or your favorite store-bought vegan mayo
- ⅓ cup finely diced dill pickle
- Juice and zest of ½ lime
- 1 ½ teaspoons finely chopped dried dill or 1 tablespoon fresh dill
- ½ teaspoon salt or to taste
- Dash of sriracha or hot sauce optional
Extras
- Tortillas use corn tortillas for gluten free
- Extra lime wedges
- Dash of sriracha or hot sauce
Instructions
- Preheat oven to 400°F. Line a rimmed baking sheet with parchment paper and set aside.
For the Slaw
- Make the slaw first so it has time to marinate and soften just a bit. Whisk the lime juice, vinegar, maple syrup and salt together and pour them over the cabbage and carrots in a medium bowl. Toss well to mix. Cover the slaw and refrigerate.
For the Breaded Cauliflower
- Stand the cauliflower up on a cutting board and slice it in half from top to bottom. Trim off the excess stem, leaving just enough to keep the florets attached. Slice each half into thinner slices. I usually get about 3 slices per half. The further away from the center you get, the harder it is going to be to keep the florets from breaking apart. It's okay if they fall apart a bit. Cut each slice in half again from top to bottom, if you like, to make them easier to work with and a bit less delicate.
- Whisk together the coconut milk, zest and juice of 1 lime and ½ teaspoon salt in a wide shallow bowl, set aside.
- Whisk together the panko, cornmeal, shredded coconut, smoked paprika, cumin, garlic powder, turmeric, ½ teaspoon salt and the pepper in another wide shallow bowl, set aside.
- Line up your breading station in this order: cauliflower, wet batter, dry breading, prepared baking sheet.
- Take a slice of the cauliflower and place it in the coconut milk batter, flipping it over to make sure all sides are covered. Next, place that slice of cauliflower in the dry breading mix, pressing it down and flipping it over to make sure it's coated evenly on all sides. Transfer your breaded slice of cauliflower to the lined baking sheet. Repeat with all remaining slices of cauliflower. Do not overcrowd the pan. Make sure to leave space between each slice of cauliflower. Use two pans if needed.
- Bake the breaded cauliflower for 25 to 30 minutes, flipping each piece over after 15 minutes, until both sides are golden brown and crispy.
For the Tartar Sauce
- While the cauliflower is baking, make your tartar sauce. In a small bowl, stir together all the ingredients. Place in the fridge until you are ready to use it.
To assemble the tacos
- To assemble the tacos, place a tortilla on a plate, top with a bit of the slaw, a piece or two of the crispy breaded cauliflower and top with a big dollop of tangy tartar sauce. Garnish with an extra squeeze of lime or dash of sriracha.
Notes
~Nutrition facts calculated for baked cauliflower, tartar sauce, and slaw. This does not include tortillas.
Nutrition
Nutrition values are calculated using online calculators and are estimates only. Please verify using your own data.
Carol Layman
Amazing!! Will make again!
Jenn Sebestyen
I’m so happy to hear you love them! Thank you for your comment!
Lauren Webster
Delicious! I made this recipe for my “anti-vegan” dad, and he loved it! My toddler devoured it too.
Jenn Sebestyen
I’m so happy to hear this, Lauren! Thank you for your comment and feedback!
Laura
This recipe was super easy to follow and so yummy! Loved the crispy cauliflower, never though of making tacos with it, but such a great idea, thank you!
Jenn Sebestyen
Thank you, Laura! I’m so glad you love it!
Kenna
The cauliflower is amazing! Kinda wish it had more of a coconut taste but it was still super tasty. The sauces and slaw were awesome too
Jenn Sebestyen
I’m so glad you enjoyed it!
Karen Becker
Delicious! My whole family loved these tacos and can’t wait to eat them again. Looking forward to trying more of your recipes!
Jenn Sebestyen
I’m so glad! Thank you, Karen!
Sandra
I use a little less lime in the slaw and sauce, but amazing recipe!!! A fam favourite 🙂
Jenn Sebestyen
I’m so glad you like them! Thank you!
Alicia
Made this for dinner, and it was phenomenal! I subbed a premade “coconut shrimp breading” mix (no shrimp in it) from Costco for the panko/cornmeal/coconut (it was the same ingredients), added a little chipotle chili powder to the tartar to make it a Mexican tartar (sounds weird but it was delish) and topped with some sliced avocado. Seriously one of the best things I have eaten in a while; thanks for the recipe and inspiration! Happened upon you with a google search, and now I’ll be checking out your blog. 🙂
Jenn Sebestyen
Thank you, Alicia! I’m thrilled that you love it! I hope you find lots of other delicious recipes here, too.
Ashley
I cannot wait to try these!!! I had a similar meal at a restaurant yesterday and I can’t wait to recreate these. Do you think could I eat the leftovers cold as a wrap for lunches?
Jenn Sebestyen
Yes, for sure. They won’t be as crispy cold, but still delicious! Let me know how they turn out.
Cyn
I made this tonight and it was amazing. I even used cabbage from my garden for the slaw. The flavors work so well together. Thanks for sharing.
Jenn Sebestyen
I’m so glad you love the recipe. I’ve never tried growing cabbage before…how long does it take?
CYNTHIA LOPINTO
I live in Florida and grow them from small plants and they do really well here. It takes a couple of months for them to be ready to eat, but well worth it.
Jenn Sebestyen
I bet. Yum!
June
The first time I made this and took my first bite, I felt my taste buds had exploded. I don’t make them often (due to time constrictions or me, just being lazy) but each time I do, I never want to stop eating them.
Great recipe, Jenn.
Jenn Sebestyen
Thank you, June! I feel the same way!
Michelle
this was great! I made it as written, and it was fantastic, thank you. The kids loved the “tartar sauce” although for someone who has had real tartar sauce (albeit a long time ago), I don’t think it tasted anything like it. Whatever you want to call it, it was tasty and went well with the dish. 🙂
Jenn Sebestyen
I’m so glad you all loved it, Michelle! And, admittedly, it’s been many many years since I’ve had real tartar sauce, too, so you’re probably right about the flavors being off. Delicious, nonetheless! Thanks for your comment.
Ekta
Hello! What can I use if I don’t have cornmeal? Thank you!
Jenn Sebestyen
Just use extra breadcrumbs. Enjoy.